How to Transition to an Evergreen Newsletter
Maybe you’ve been sending weekly broadcast emails with all your newsletter goodness and you’re starting to realize ‘Dang, this is a lot of work and new people will never see these gems’ and so here we are − wondering how to make the switch to an evergreen newsletter. Well, you’re in luck, because this tutorial covers how to make the transition in a few simple steps.
Step 1: Create a new Drip campaign
We first want to create a new Drip campaign with an obvious name like ‘Newsletter’. It’s not wise to include ‘evergreen’ in the title though because the campaign name can be publicly seen from the unsubscribe / email preferences page. After naming your campaign click the ‘Create Your First Email’ button.
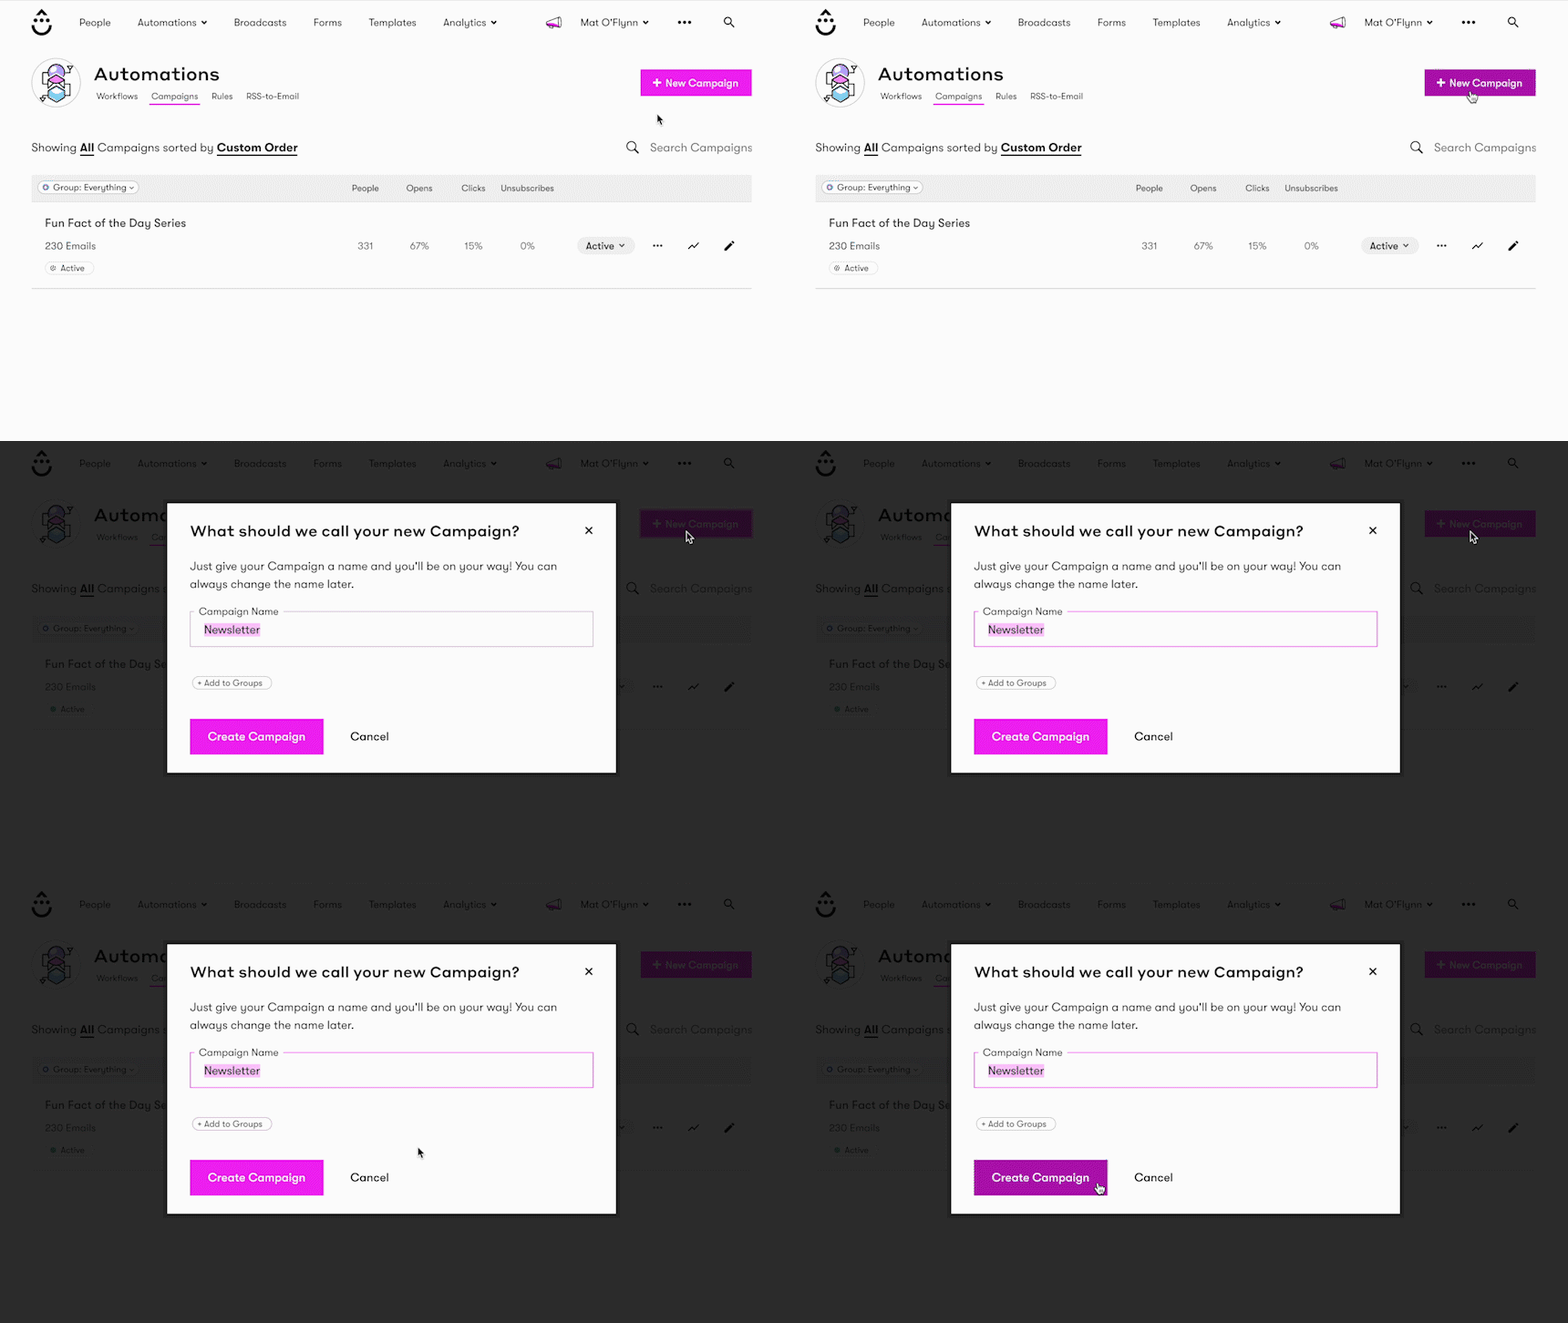
Step 2: Add your existing broadcast emails
Next we’ll want to choose whether your previous broadcast emails were made using Drip’s ‘Visual Builder’ or ‘Text/HTML Builder’.
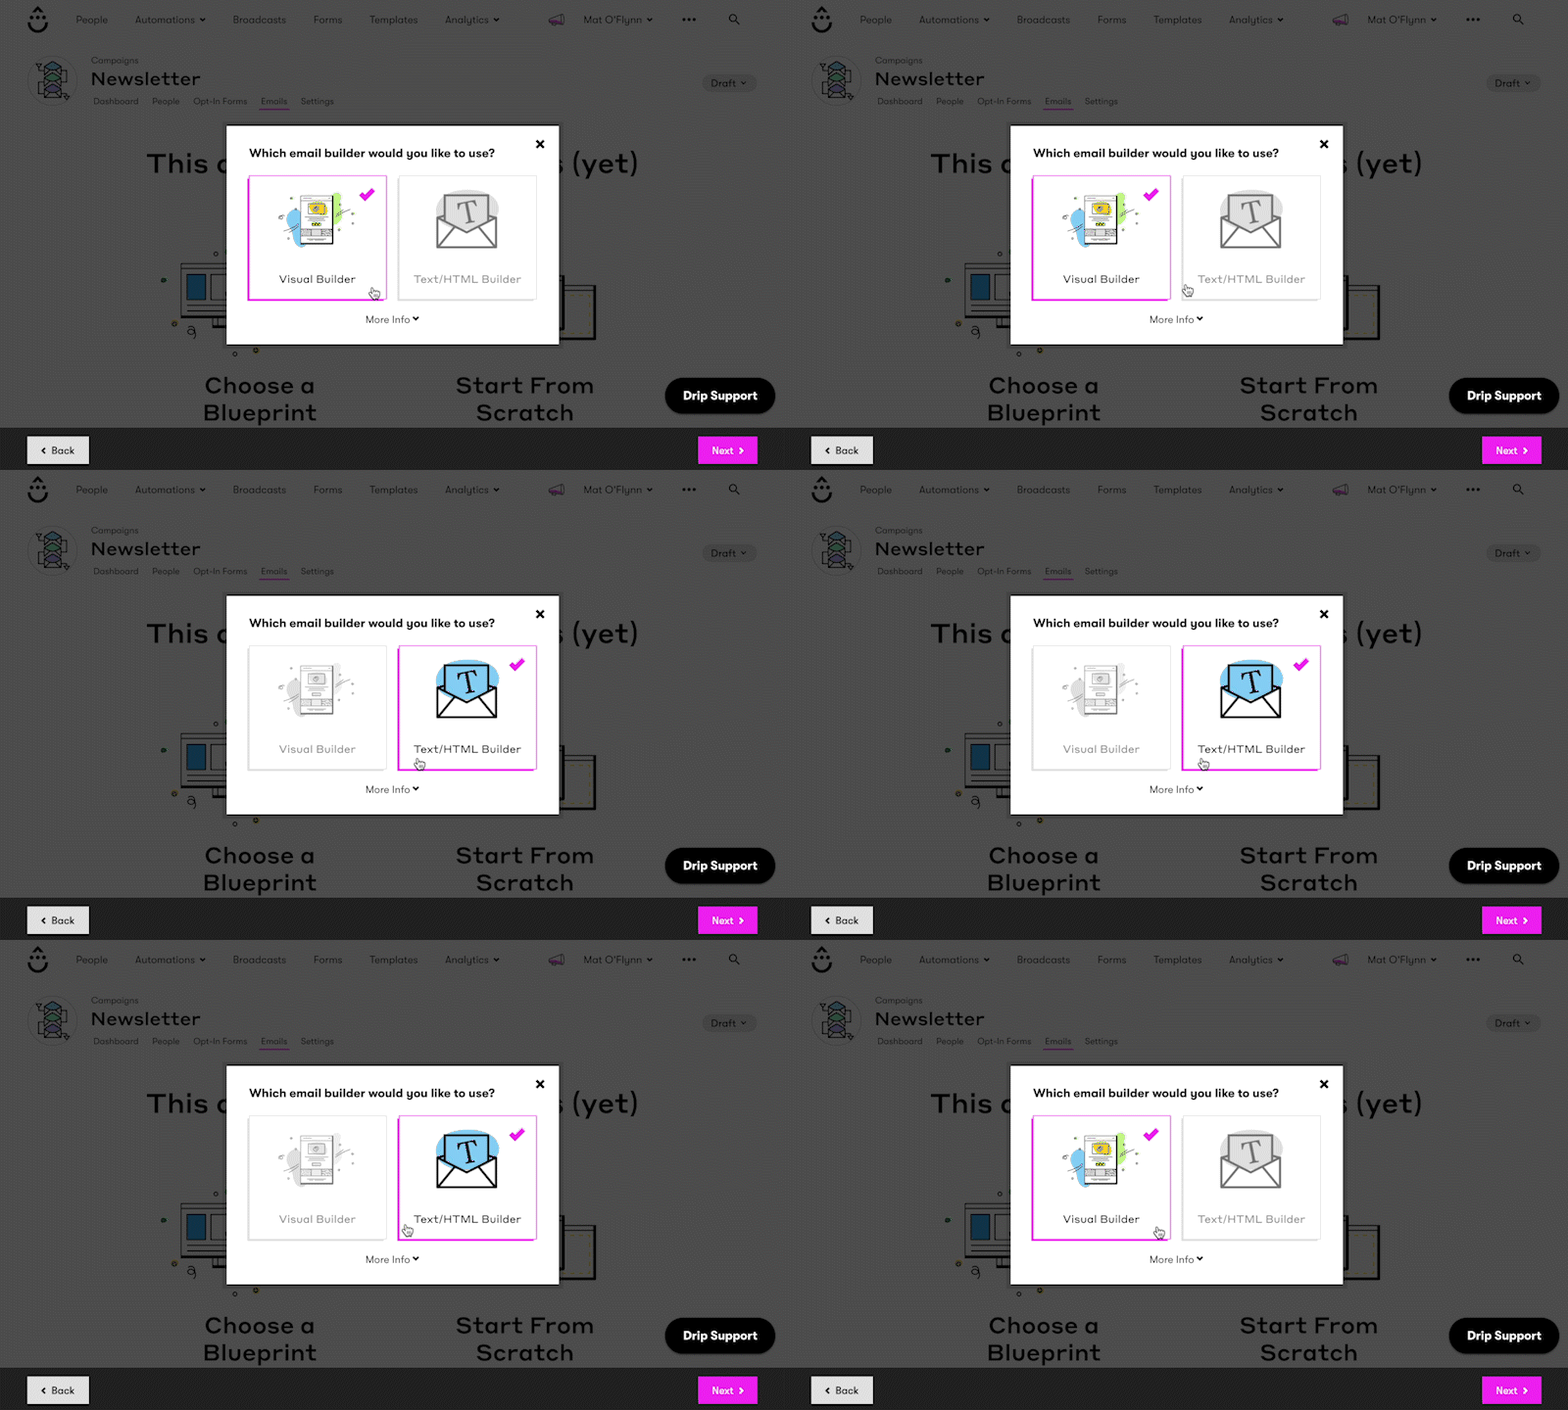
For this example we’ve selected ‘Visual Builder’ which allows us to choose a starting point. Click the ‘Recently Edited’ tab and select the email you want to add to your evergreen campaign. If the email looks good you can click the ‘Emails’ tab to reorder the campaign email (by default, the email will be added to the end of your campaign).
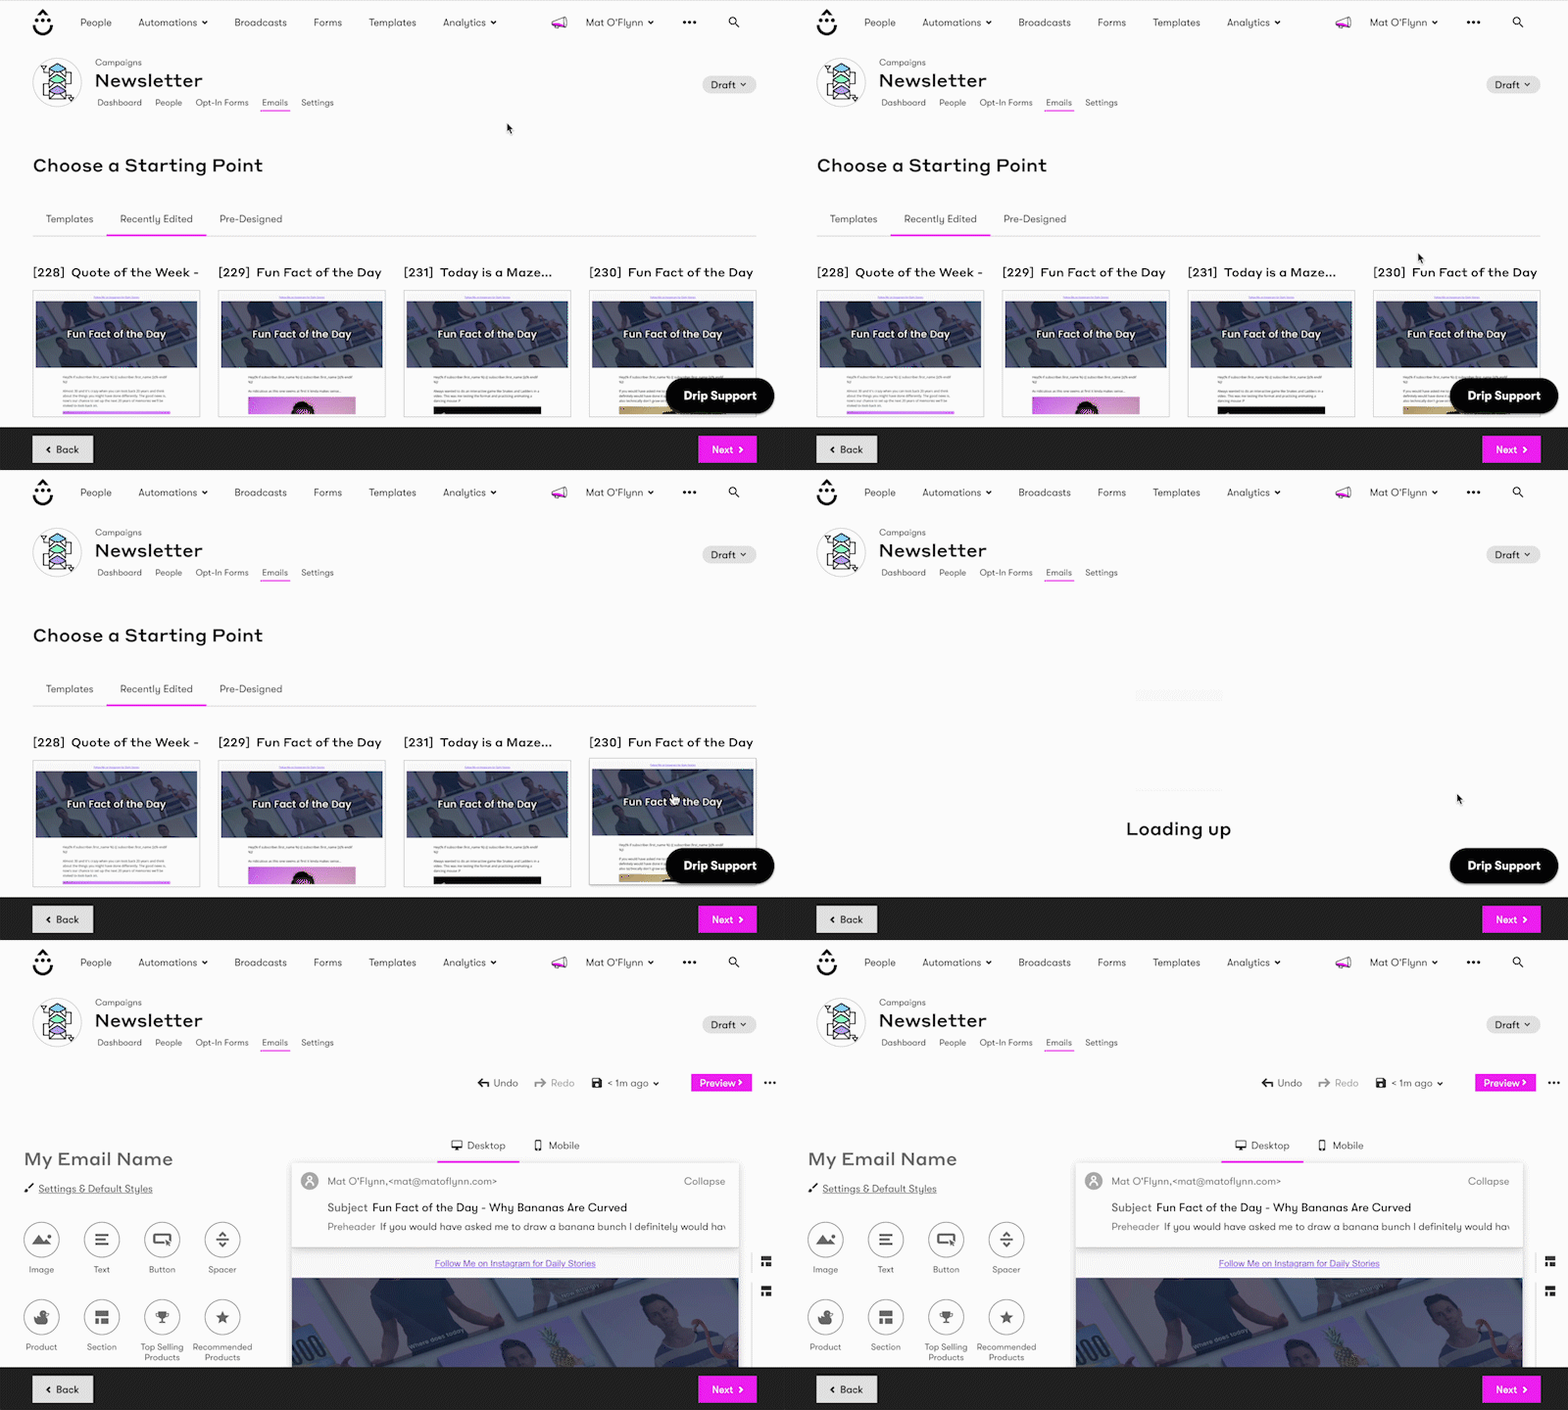
Step 3: Start existing folks at the right place
Now all that’s left is to create a bulk operation that adds everyone that has received your last broadcast email to the new evergreen campaign and start them on the campaign email of your choice.
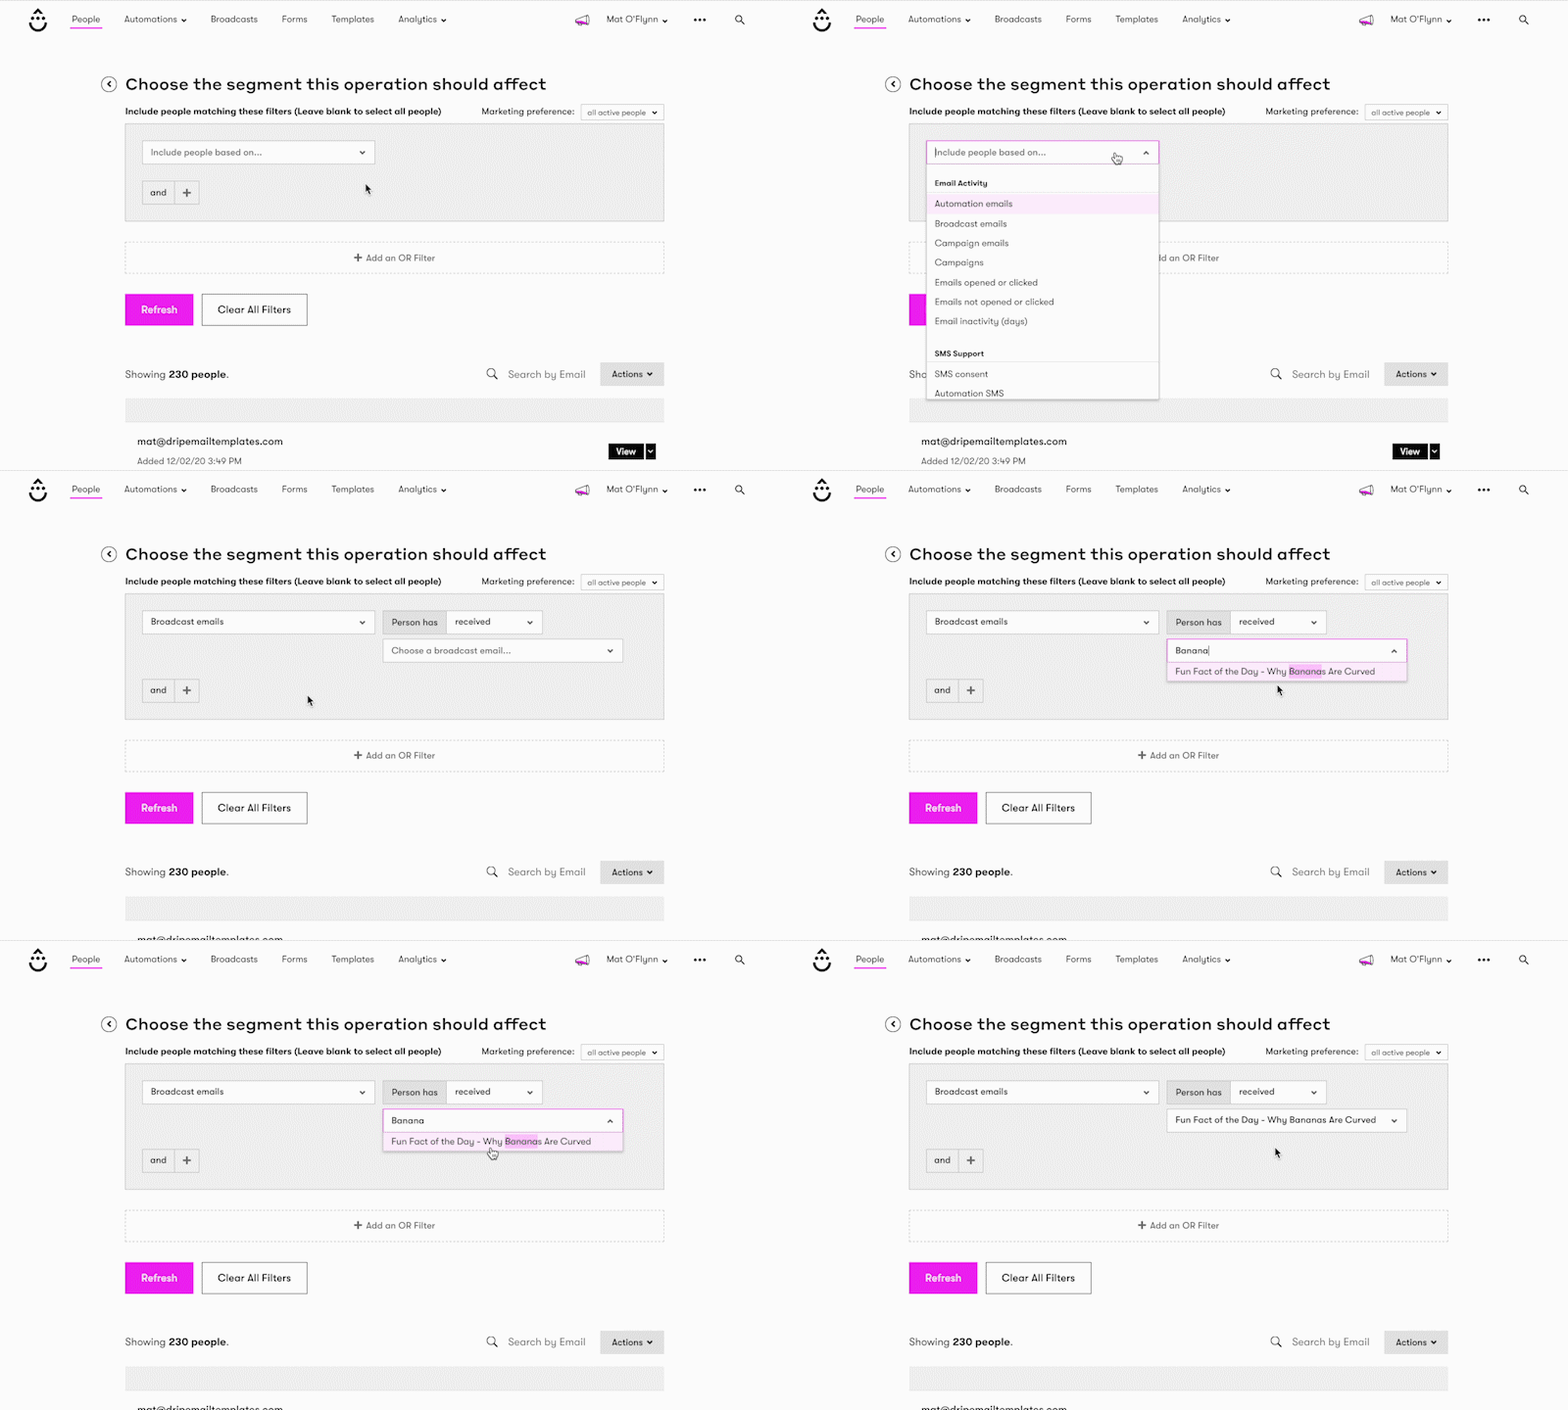
Click ‘People’ from the top menu, then the ‘Bulk Operations’ tab and then the ‘New Bulk Operation’ button. You will see three bulk operation options and we’ll want to click the ‘Begin’ button under ‘Choose a segment’.
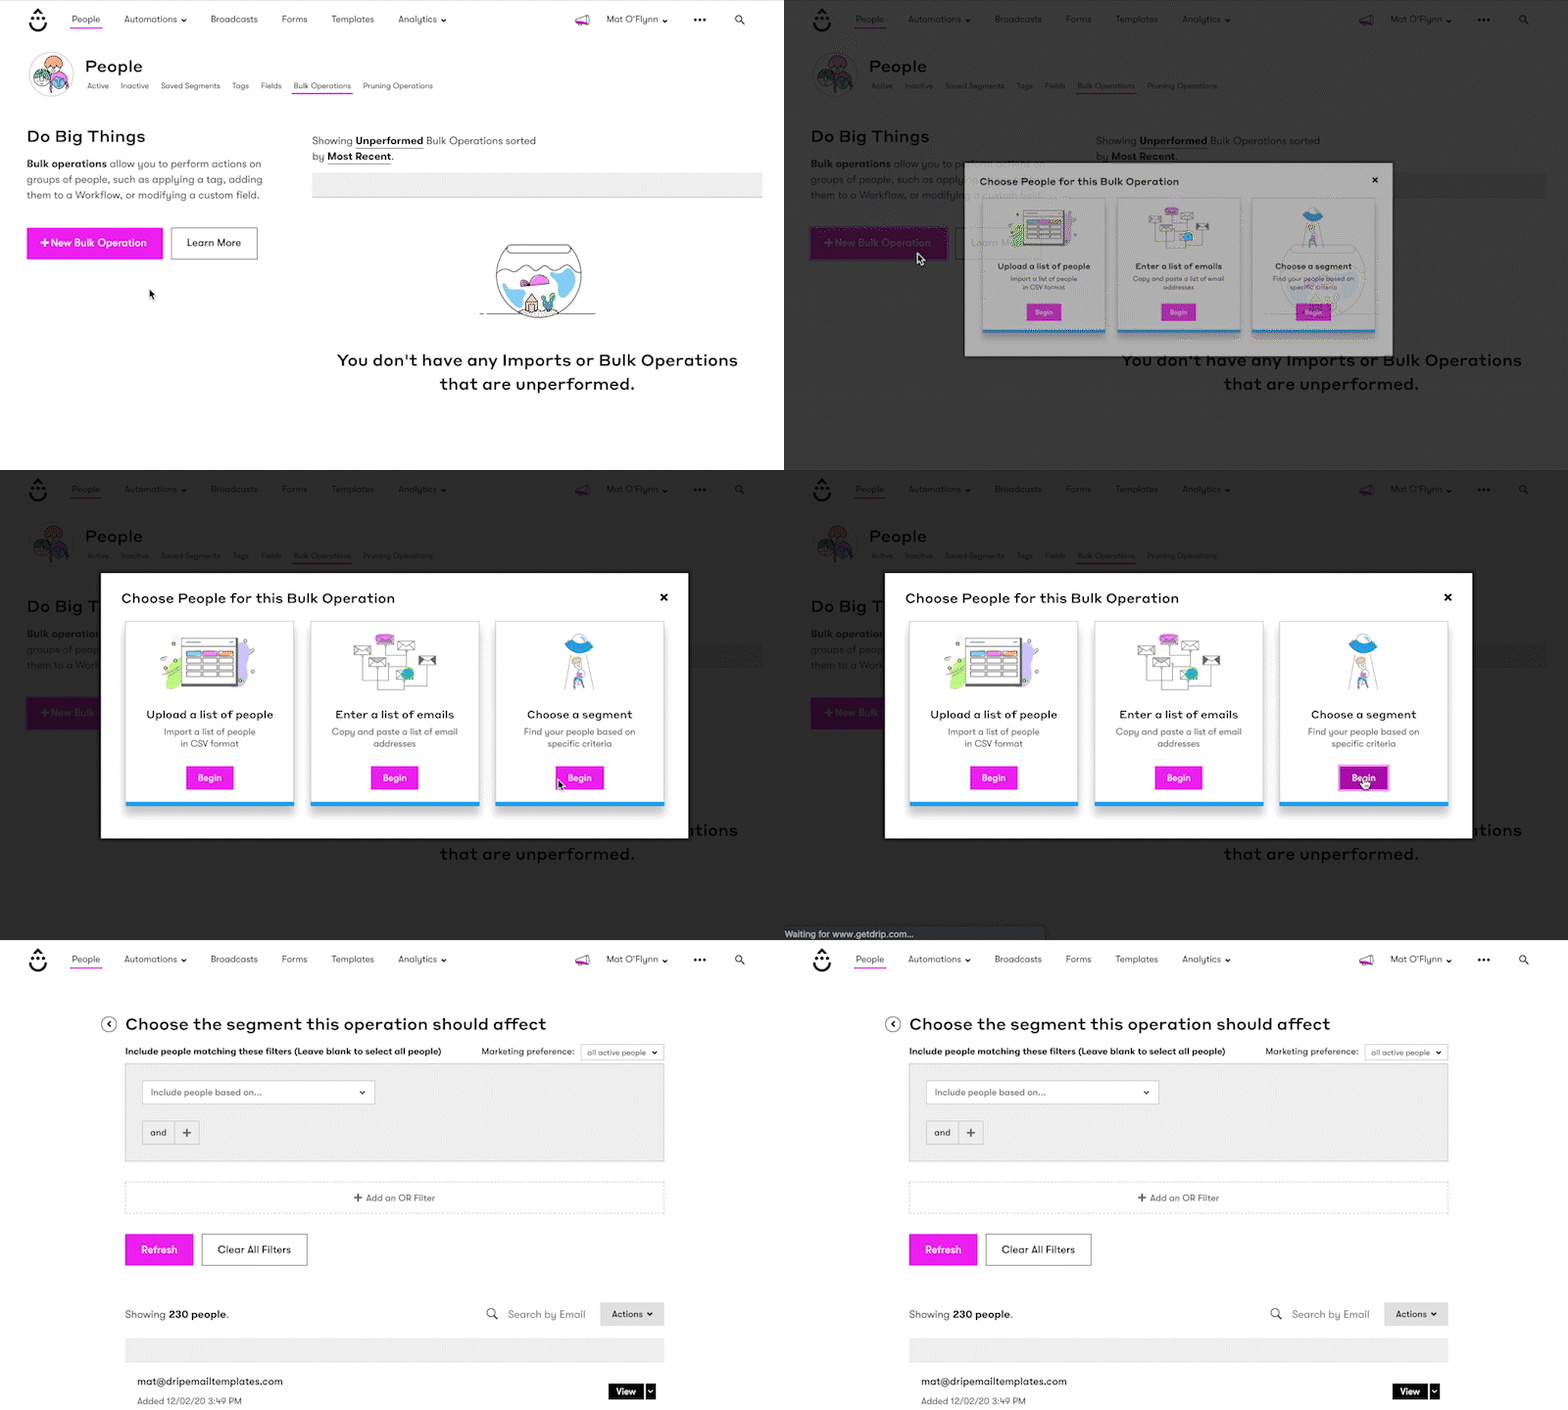
Click the ‘Include people based on…’ dropdown to choose the filter ‘Broadcast Emails’ and ‘Person has received’ your last broadcast email. Click ‘Refresh’ and double check that the number of people looks correct. If the number makes sense click the ‘Next’ button at the bottom of the page.
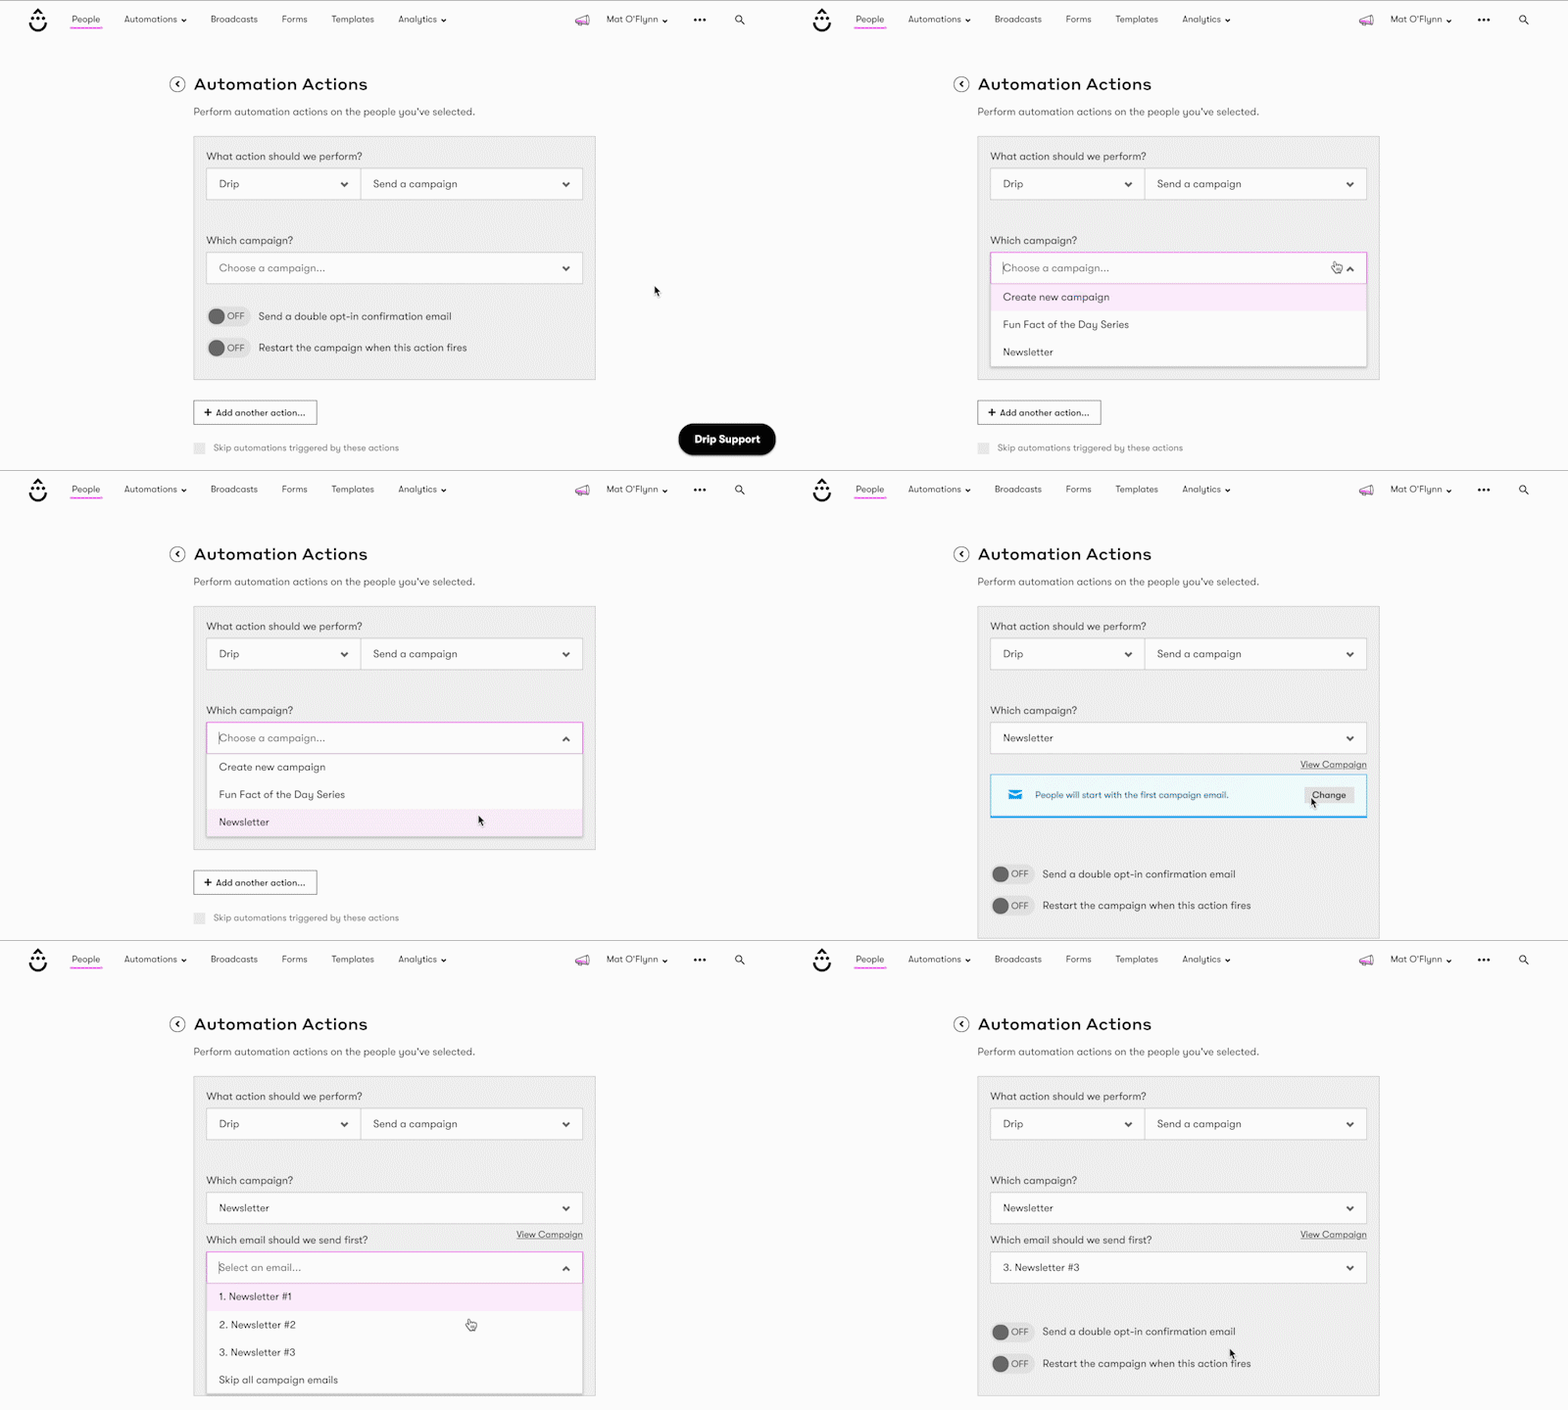
Now is where we’ll be able to start your subscribers on a specific campaign email (the next broadcast email you would have sent them in your non-evergreen, broadcast days).
Click the ‘Choose an action…’ dropdown to see the ‘Send a Campaign’ option and under ‘Which Campaign’, choose your newly created evergreen campaign. This is the important part… where it says ‘People will start with the first campaign email’, click the ‘Change’ button and select the email they should be sent first (the email that would have been your next broadcast email). Now click the ‘Next’ button to immediately send the next campaign email or schedule it to be sent out at a specific time.
Step 5: Test things!
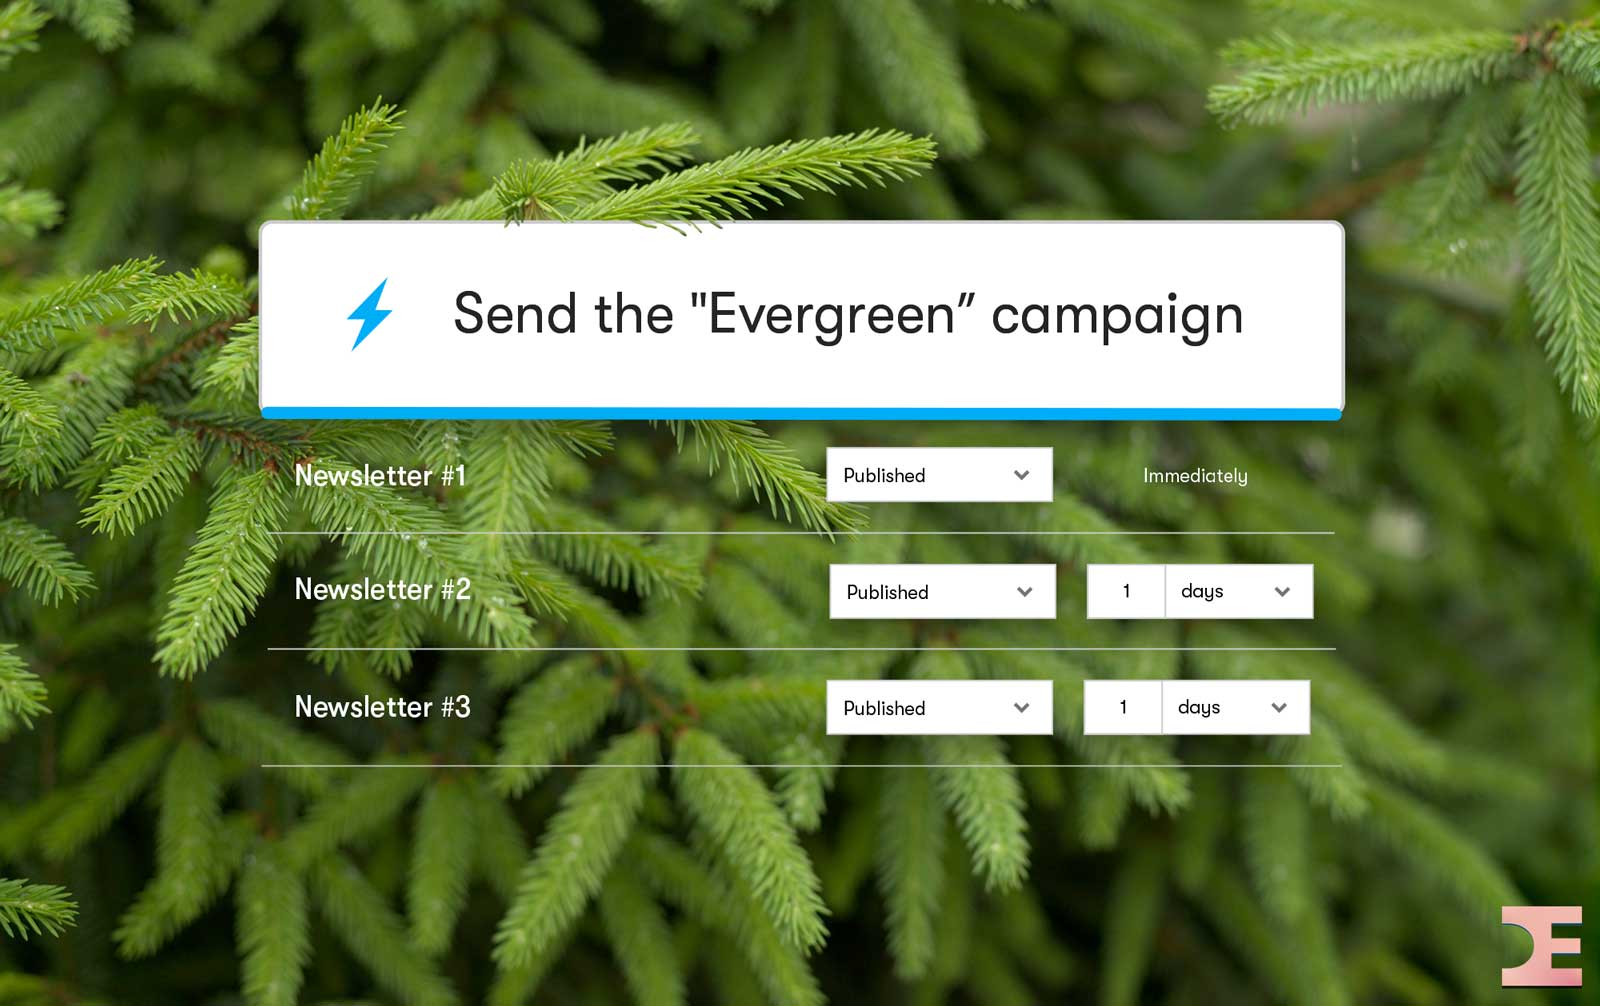
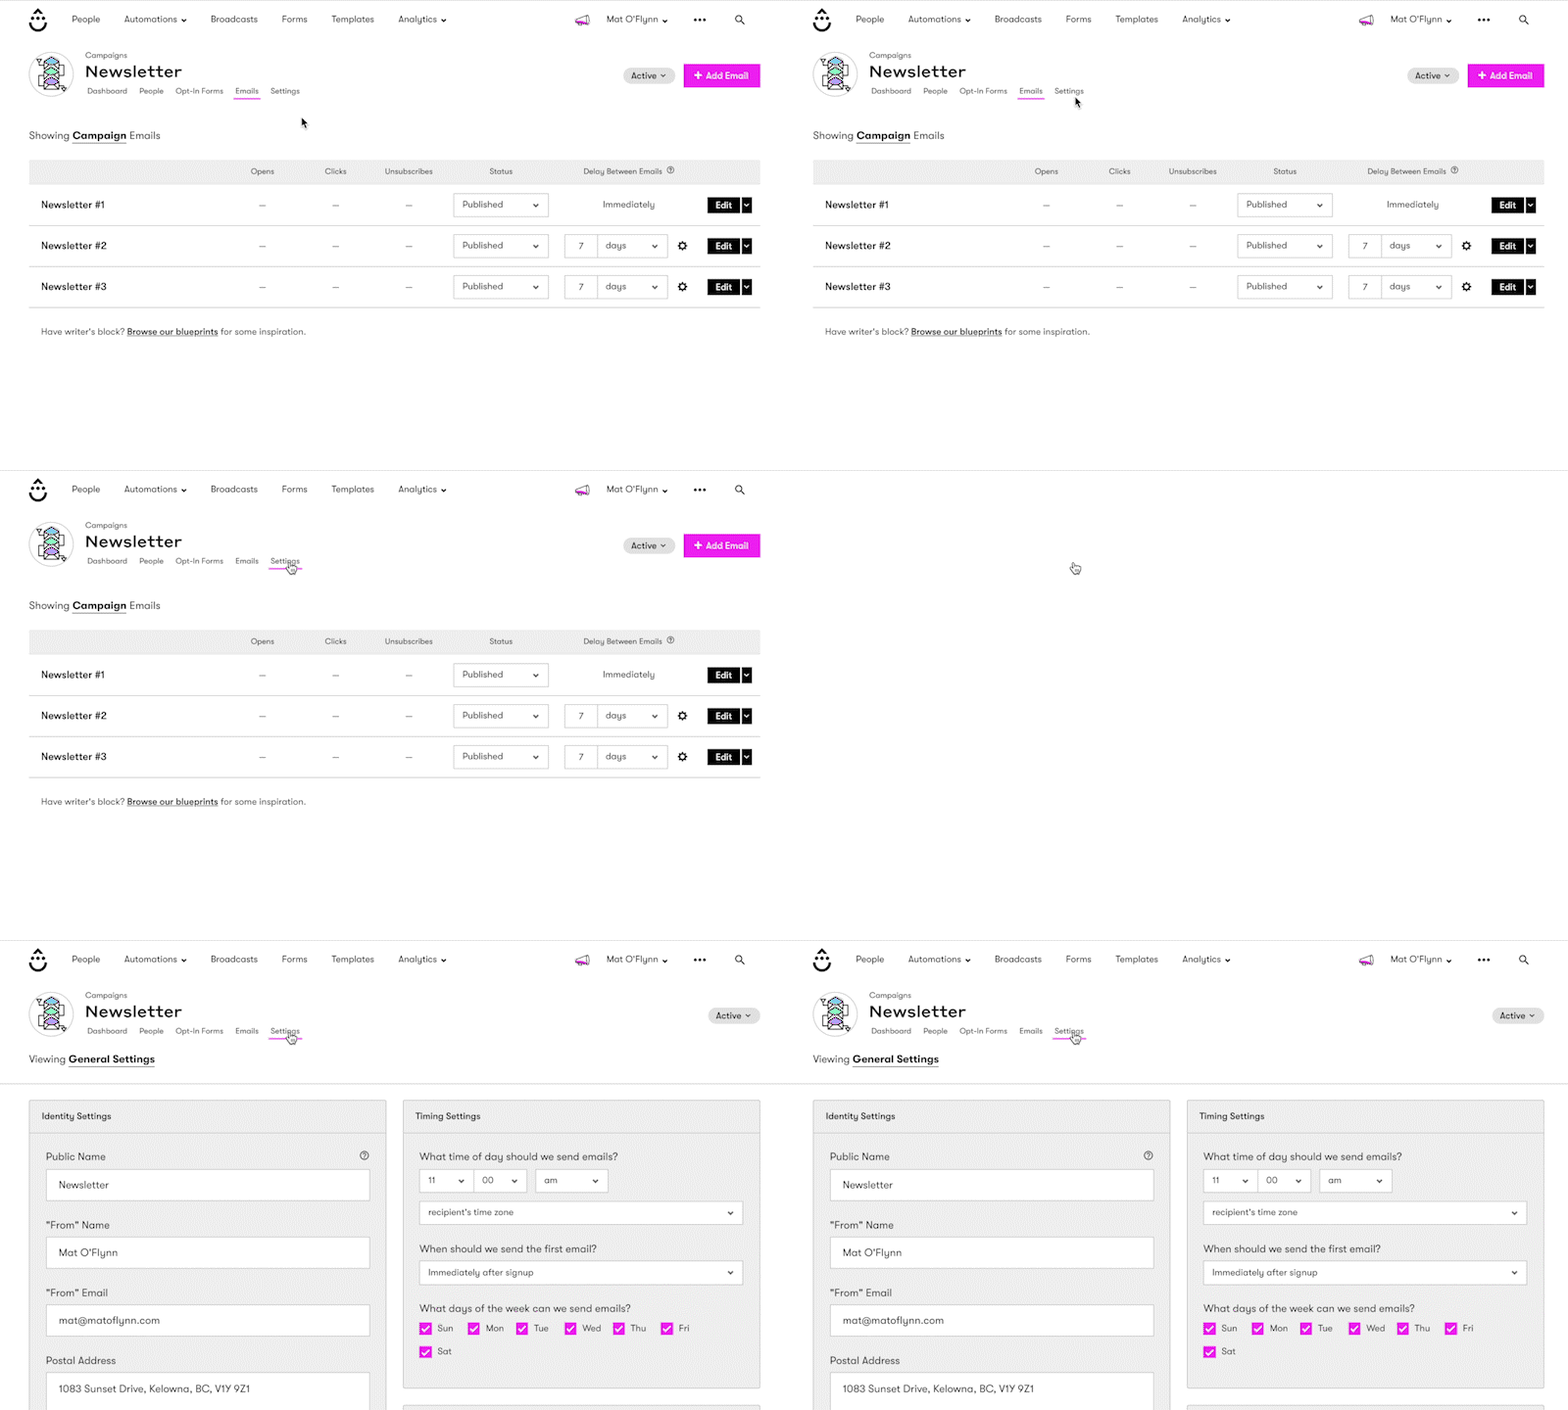
And that’s it! Some of the things to keep in mind are to ensure the delays (such as 1 day) between your campaign emails and the send time (such as 11:00am) makes sense for your audience and to review and send some test campaign emails to check that they don’t reference any specific dates and are still the beautiful creations you intended them to be.
Have questions?
Leave them below! Or, schedule a consultation with us.
